It's quick and easy to refresh those dingy, dinged-up floors. Read on to learn the steps.
2 hours
Beginner
Around $100
Introduction
Painting a hardwood floor can help extend its lifespan and give your room a unique, colorful look.
One of the final steps for our latest house renovation was painting the old solid wood floors in the upstairs bedroom loft. Made from nice pine boards, we wanted to preserve the texture and character — even their century’s worth of dings. So we opted for a simple repaint.
When repainting painted wood floors, or anything else, it’s vital to choose a brand compatible with your existing paint. To figure out what sort of paint base we were dealing with, we wiped it with acetone. Although the “acetone test” is certainly not foolproof, water-based paints typically end up partly wiping off on the rag.
For us, no paint came off. So we assumed it was oil-based, especially considering the age of the house. We also consulted with our local paint store professionals for what type of paint they recommended.
If your painted wood floors are in need of a refresh, here’s how to do it with the least amount of hassle.
When should I call a pro?
You might need professional help if:
- You’re sensitive to paint or mineral spirit fumes.
- The floor already has several layers of paint that need to be removed to make a nice surface.
- There are damaged planks that need replacement.
About the Experts
Frank Arellano, a manager at Sherwin-Williams in Alamosa, Colorado, and several other experts there added their expertise to this project. These pros offer more than two decades of experience helping people choose the optimal paint for their home and commercial projects.
Note: We used Sherwin-Williams Porch & Floor Enamel, Interior/Exterior Latex, satin finish, color “Courtyard.”
Tools Required
- broom
- Bucket
- Mop
- Paint brush (2 in. or personal preference)
- Paint roller with extension handle
- Power orbital sander (optional for very rough floors)
- Roller pan
- Sanding blocks - 100 to 120 grit
Materials Required
- Floor paint
- Lint-free rags
- Mineral spirits
- Paint stir sticks
- Painter's tape (optional)
- Roller cover and roller pan liner
- Tack cloths
- Trisodium Phosphate (TSP) cleaner
- Water
Project step-by-step (5)
Thoroughly clean the floor
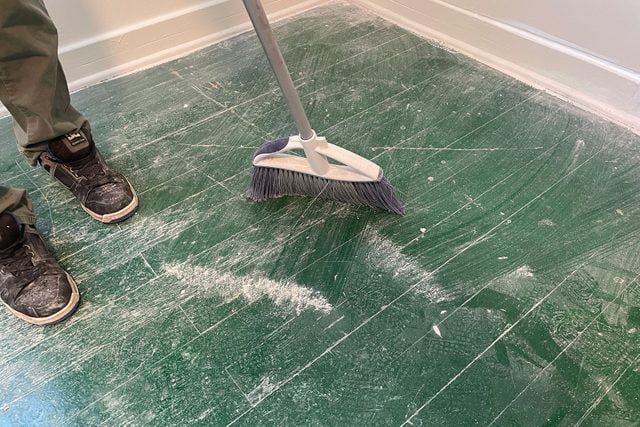
- Sweep the floor free of loose dirt and debris.

- Mop at least twice to remove all dust and residue from spills, etc. Use plain water, changing it often to keep it clear, or add trisodium phosphate (TSP) if your floor is particularly dirty.
- Let the floor air dry completely.

Prepare the surface to accept paint
- Lightly sand the floor by hand or with a small power sander. A quick pass is fine. You’re just roughing up the surface so the paint has something to adhere to.

- Wipe the floor with tack cloths, to pick up any dust from sanding.
- Using lint-free shop rags, wipe with mineral spirits to remove any remaining moisture or dust. This will also prepare the surface to allow the paint to take hold better. Make sure to keep the room well-ventilated and wear nitrile or other protective gloves during this step.

Tape off the baseboard, as needed
- If you’re worried about getting paint on the baseboard, mask it off with high-quality painter’s tape. We started doing this, but quickly realized it wasn’t necessary in our situation. We realized we could cut in neatly without getting paint on the baseboard.

Cut in the perimeter with a brush
- Mix and pour the paint into the roller pan. Use a pan liner to make cleanup easier.
- Apply a base coat with a paintbrush around the floor’s perimeter, and anywhere else a roller can’t easily reach or paint evenly.
Pro tip: Make sure you thoroughly mix the paint. Even if it appears fully mixed, stir for a couple more minutes, to be sure you’ve mixed in all the solids from the bottom of the can. Floor paints feature a lot of solids. If they’re not mixed in properly, you’ll end up applying a thinner coat of paint.

Roll the floor with paint
- Wet your roller cover in the pan until it’s saturated.
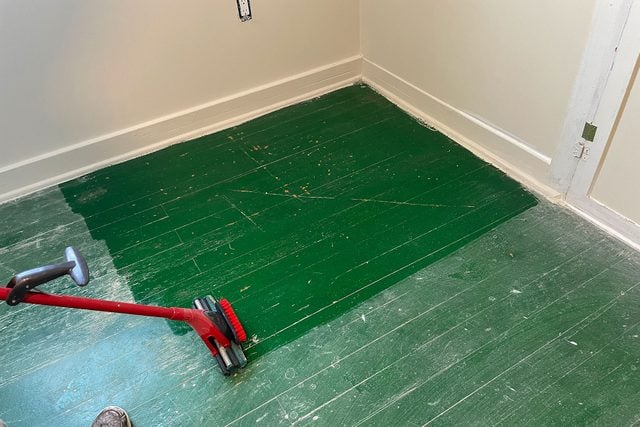
- Roll the paint on the floor, starting at the farthest edge from your exit door.
- Roll in the direction the boards are installed. If you have a good self-leveling paint, this might not matter too much.
- Work your way toward the exit. As you go, make sure to even out any high spots in the paint created from the edge of the roller cover.
- Let the floor dry, according to paint manufacturer instructions.
- If it needs a second coat (per manufacturer recommendations, or it just visually looks like it should have one), repeat Steps 4 and 5.

FAQs
What are the benefits of painting wood floors?
It helps prevent splinters, keeps dust down, provides a protective coating and adds aesthetic appeal to match a room’s decor.
What kind of paint should you use on wood floors?
It depends on what kind of paint is already on them. If you don’t know, try the acetone test, like we did. But keep in mind that’s not foolproof. It’s still wise to consult a pro to ensure you use a paint that’s compatible with the old surface, regardless of its composition.
How long does wood floor paint last?
It depends on the type of paint and foot traffic. In general, it should last at least a couple of years, possibly much longer.
Is it better to paint or refinish hardwood floors?
That’s really a matter of preference for the look you like and the condition of the floor.
If the hardwood floor can be refinished, most people will opt for that. But if it’s already painted, or if it’s badly stained or damaged, painting might make the most sense.
What are the disadvantages of painting wood floors?
Painted floors require more frequent maintenance than hardwood finishes. They also hide the beauty and depth of the wood grain.


