A full day
Intermediate
$101–250
Introduction
Need more storage in your garage?
If your space is feeling a little cramped and you just can’t seem to find anywhere else for storage, look no further than the walls.
There are a number of ways that you can add storage space to your walls, from decorative floating shelves to a fully featured shelving unit. But if you’re looking for something that works great for tool storage in your workshop, this pegboard wall cabinet can turn 16 sq. ft. of wall space into 48 sq. ft. of storage space.
It’s fairly easy to build, and it won’t cost you an arm and a leg. You can put it together with a solid day’s work, and the next day, you’ll have a clean, organized garage welcoming you.
Tools Required
- Air compressor
- Air hose
- Brad nail gun
- Circular saw
- Cordless drill
- Countersink drill bit
- Dust mask
- Flush-trim router bit
- Framing square
- Hacksaw
- Hearing protection
- Level
- Miter saw
- Paintbrush
- Router
- Safety glasses
- Self-centering drill bit
- Self-centering screw hole punch
Project step-by-step (7)
Build the Base Frame
- Cut your 1×4 frame boards to size.
- Pro tip: Use a higher-grade pine—it’s worth the extra money to be able to work with straight, knot-free wood.
- Sand all the boards with 100-grit sandpaper before assembling the frames.
- Glue the joints and nail them with 1-1/2-in. brads, just to hold them together.
- When the base is assembled, go back and drive in two 2-in. trim head screws.
- Note: If you don’t have a brad nailer, no problem; the screws are plenty strong on their own.
Fasten Pegboard to the Base Frame
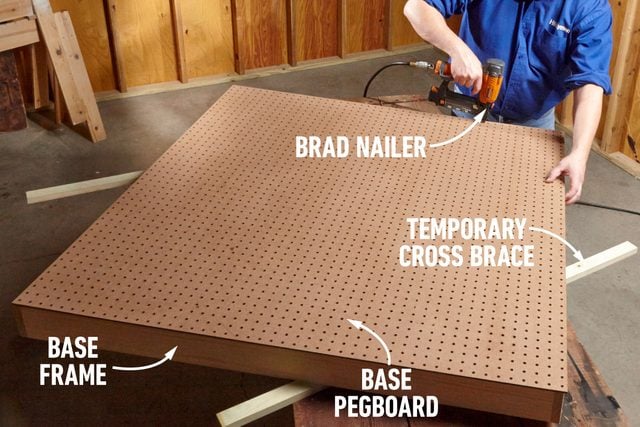
- Attach temporary braces to hold the base frame perfectly square.
- Lay a 4 x 4-ft. sheet of pegboard over the frame.
- Note: The oversize sheet lets you position the holes so they won’t be along the outer edge of the cabinet.
- Pro tip: If you don’t have a router to trim off the excess pegboard (see below), position the pegboard, mark it with a pencil and cut it to size before nailing it in place.
Trim the Pegboard Flush
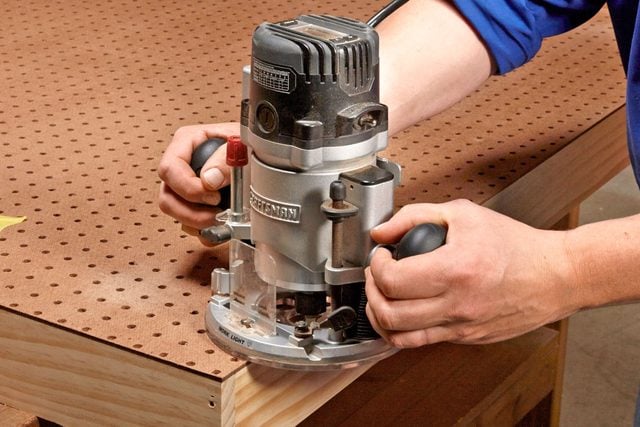
- Install a flush-trim bit in your router and trim off the overhanging pegboard.
- Note: Routing pegboard whips up a dust storm, so wear a mask.
Complete the Doors
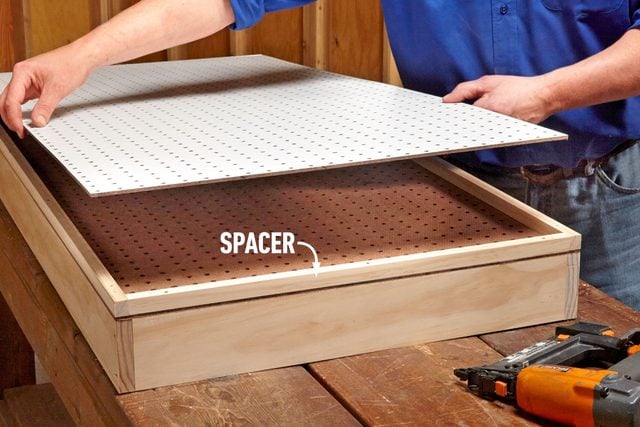
- Rip down 3/4-in. strips of wood to act as a spacer between the first and the second layers.
- Note: This will allow clearance for the peg hardware on both sides of the door.
- Align the spacers the same way you did with the frame, so the end grain cannot be seen from the sides.
- Tack them in place with 1-1/2-in. brads.
- Tack on the outer layer of pegboard or dry-erase board (white/gloss hardboard panel board) with 1-in. brads
- Drive in 2-in. trim head screws about every 8 in. or so.
- Pro tip: Pegboard and other hardboard materials tend to pucker when you screw into them, so predrill the holes with a small countersink drill bit. Don’t attach the screen mold on the outside of the doors until the doors are hung onto the base.
Add Filler Strips
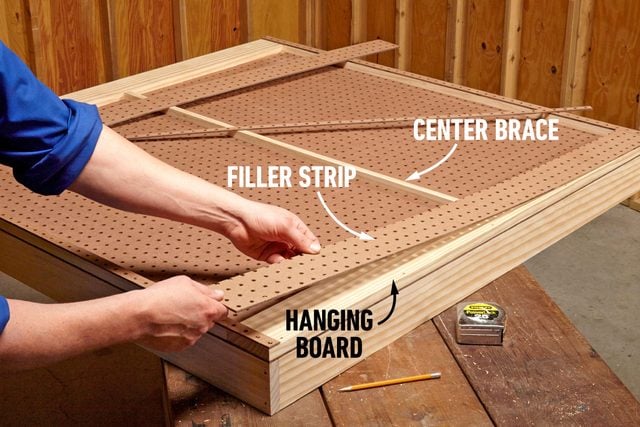
- To create space for the peg hardware on the back of the base, install 3/4-in. strips of pine on the back two sides of the base.
- Fasten them with glue and 1-1/2-in. brads.
- Install a full pine 1×4 on the top and bottom of the back side of the base.
- Note: These are the boards you’ll screw through when you hang the cabinet on the wall.
- Glue and tack these boards into place, and then drive 2-in. trim head screws through the boards into the base frame.
- Use another 3/4-in. strip of pine to brace up the center of the pegboard.
- Secure it with glue and a few 1-in. brads from the front side of the base.
Install the Doors
- Use a hacksaw to trim them down the hinges, which are a little longer then the cabinet.
- Install the hinge to the base first.
- Fold it over the front edge of the base at a 90-degree angle and install the screws.
- Clamp the doors into place before you screw the other half of the hinge.
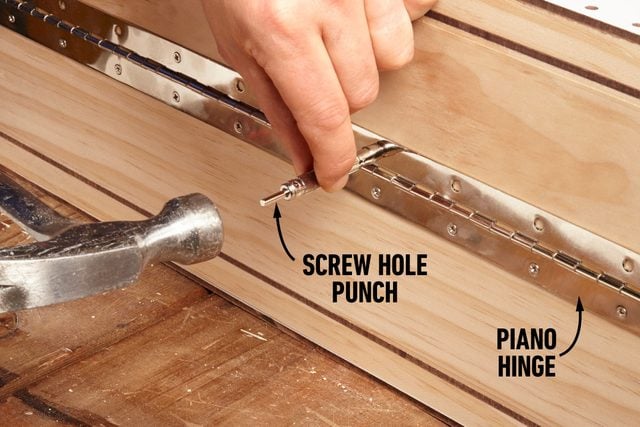
- Pro tip: A self-centering screw hole punch helps you center the screws in the hinge holes.
- Pro tip: If the gap between the doors isn’t perfectly even, adjust the screen mold on the front of the doors as you install them until it is. Fasten the screen mold with 1-in. brads.
Finish It Up
- Fill the holes with wood putty.
- Cover the wood with clear polyurethane.
- Pro tip: Tape off the pegboard/dry erase board before you treat with the poly, but don’t use an aggressively sticky tape when you tape or you may pull the surface right off
- Screw the cabinet to the wall with screws that penetrate the studs at least 1-1/4 in.
- Try to hit at least three studs on the top and three on the bottom.
- You can install handles on the bottom if you like.
- Pro tip: When you shop for the hardware you’ll need to hang your tools, avoid 1/8-in. hooks. They fit in the 1/4-in. holes but tend to pull out when you remove a tool.


