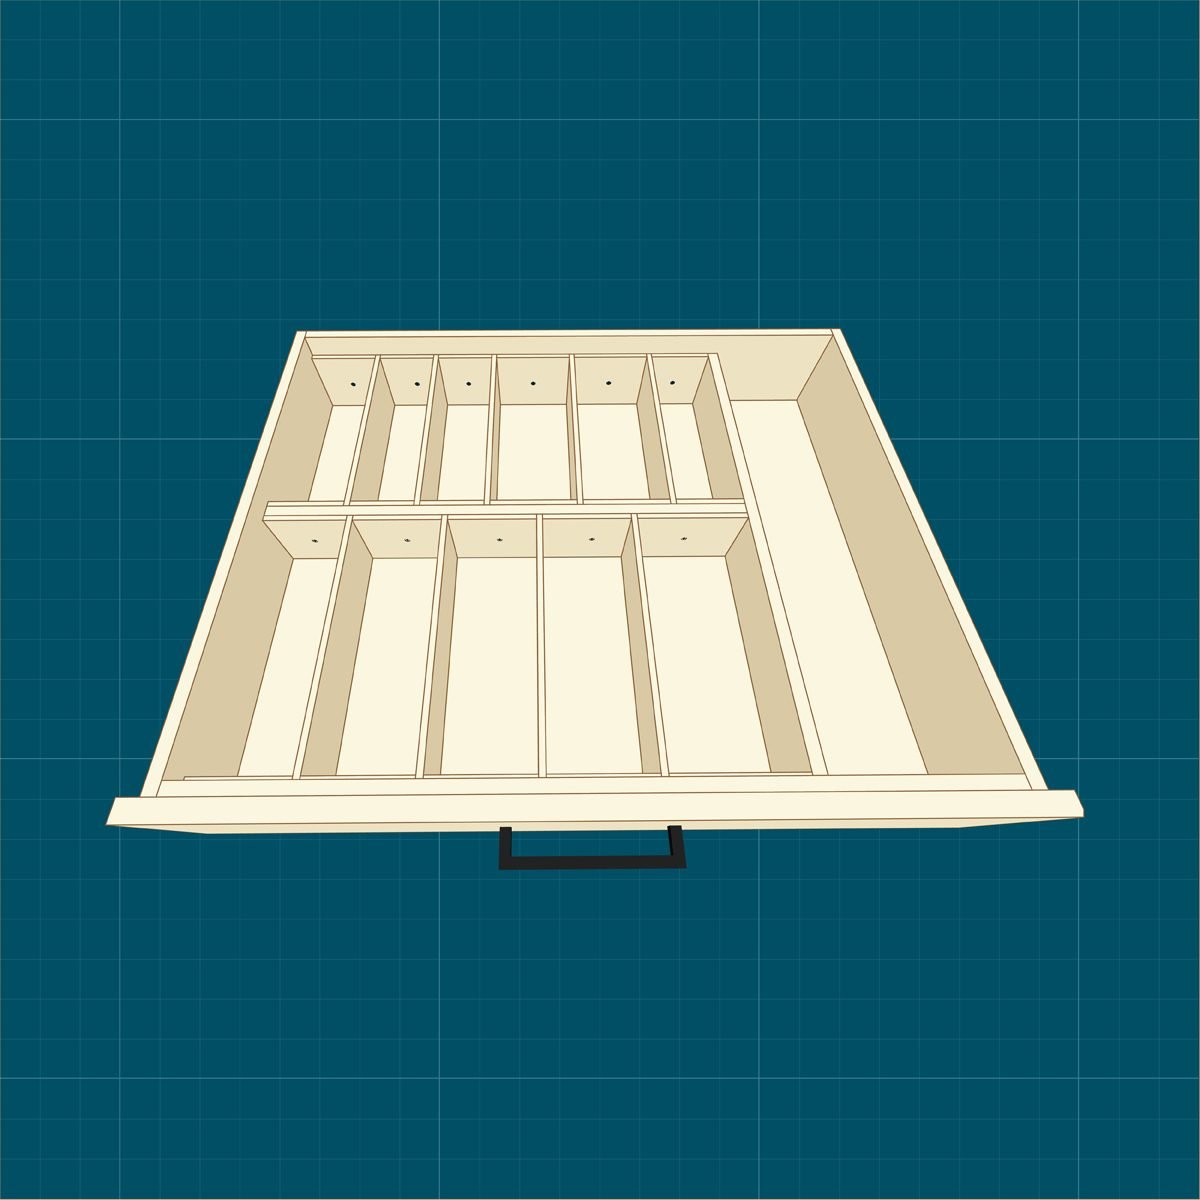
Organize your kitchen utensils with this quick and easy project.
An hour or less
Beginner
$10-$20
Introduction
Store-bought utensil tray rattling in your silverware drawer? Build this DIY drawer organizer that fits well and holds everything nicely.
Introduction
Trying to organize the utensil drawer in your kitchen? You could buy a tray to hold everything, but chances are it’ll be too big or too small. Here’s a better idea: Build a custom drawer organizer to fit your utensils and your drawer.
Project Overview
Tools Required
- Basic woodworking tools
- Drill/driver
- Miter saw / circular saw
- Table saw
Materials Required
- 1-1/2" trim screws
- 1/2” Wood screws
- 1/2” x 2’x2’ Maple plywood
- 1/4” x 2’x2’ Maple plywood
Project step-by-step (4)
Divide the Drawer
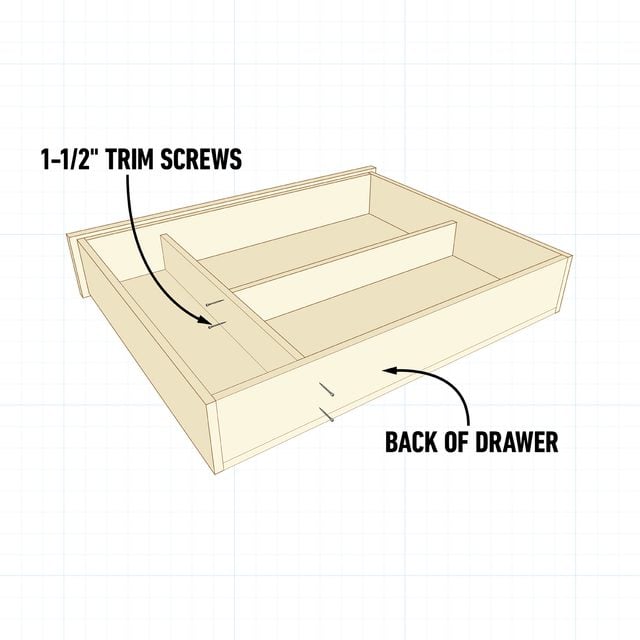
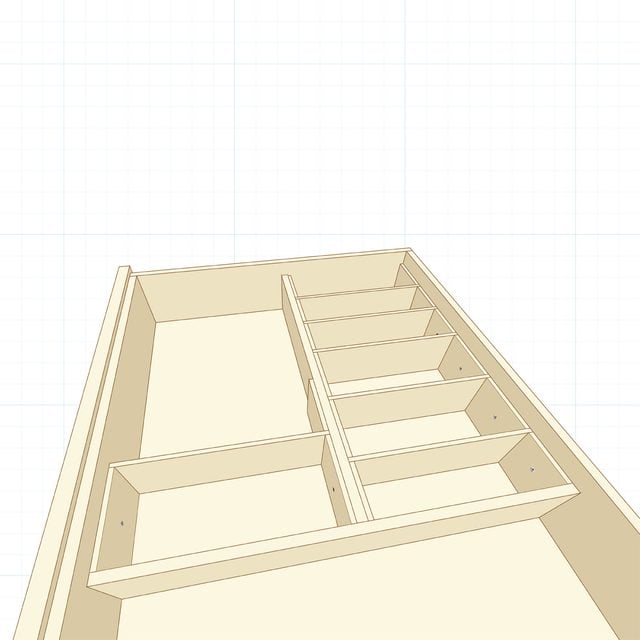
On the table saw, rip two pieces of 1/2-inch plywood so they’re one inch shorter than the height of the drawer. Cut one to length to fit the depth of the drawer, and the other six inches shorter than the width. Fasten them together with 1-1/2-inch trim screws to form a T-shape. Then position the T-shape inside the drawer and fasten it in place through the side and back.
Make Storage Compartments
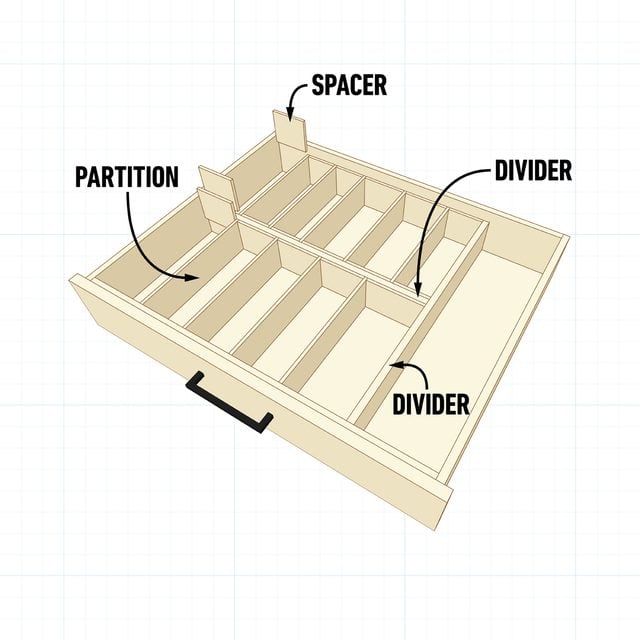
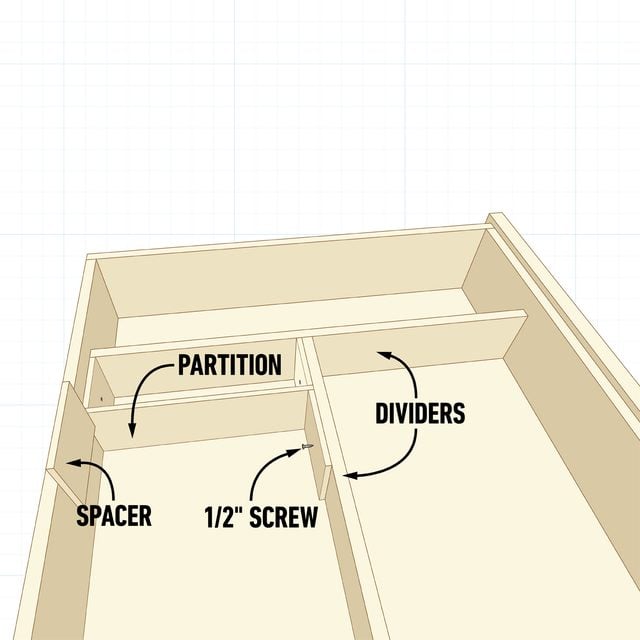
Create the compartments with spacers and partitions. For each compartment, fasten identical 1/4-inch plywood spacers to the drawer and the divider using 1/2-inch wood screws. Then cut and fit a partition from 1/4-inch plywood that sits against them. Hold the partition in place with another set of spacers.
Fill the Sections and Customize
Continue to add spacers and partitions to fill both sections of the drawer. To make a wider compartment, cut the spacers for that compartment longer. Keep the long section undivided to store long handled wooden spoons, spatulas, and whisks. Customize the rest of the compartments to fit specific utensils.
Organize Your Kitchen Drawer
With the compartments made, slide the drawer back in your cabinet and start organizing your flatware.


